Introduction#
After covering simulation workflows in the previous five articles, we now begin a new section: real drone flight. Real flight requires significantly more configuration and higher safety standards than simulation, and we’ll cover each aspect in turn. This article starts with the essential first step: flashing the onboard computer.
When controlling drones with ROS, the onboard computer handles critical computation tasks — providing sufficient processing power without interfering with the flight controller, enabling real-time path planning, multi-drone cooperative decision-making, visual SLAM, and more. If you haven’t set up a simulation environment yet, start with the ROS2+PX4 Simulation Setup Guide. This guide uses the Nvidia Jetson Orin NX and flashes Ubuntu 22.04.
Hardware required:
- Onboard computer (Nvidia Jetson Orin NX used here)
- Power supply for the onboard computer
- Mouse, keyboard, and monitor
- At least one Dupont (jumper) wire
- A personal computer with Ubuntu dual-boot or virtual machine
- USB to Type-C cable
Host Environment Dependencies#
Install required packages on the host Ubuntu system:
sudo apt install sshpass abootimg nfs-kernel-server libxml2-utilsNote: Flashing via a virtual machine will download many files. Ensure at least 100GB of free disk space!
Installing SDK Manager#
SDK Manager is the standard flashing tool for Nvidia onboard computers. Download it from Nvidia SDK Manager ↗.
If prompted to log in, register a free Nvidia account. Download the .deb package for your Ubuntu version.
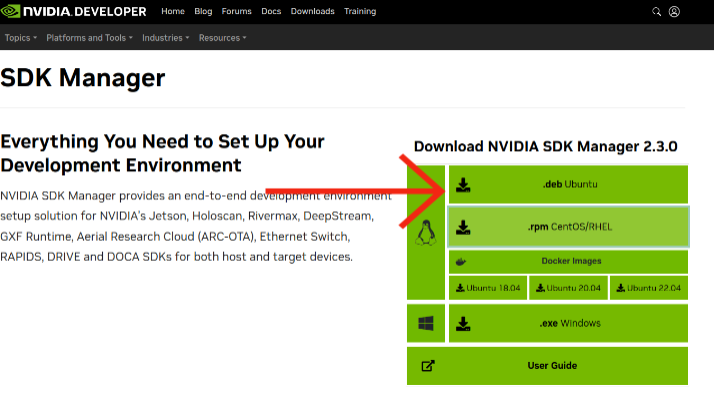
Install the package:
cd ~/Download
sudo dpkg -i sdkmanager_2.3.0-12617_amd64.debIf you encounter dependency errors, fix and update:
sudo apt-get install -fReboot and reinstall. Once the installation completes, log in again:
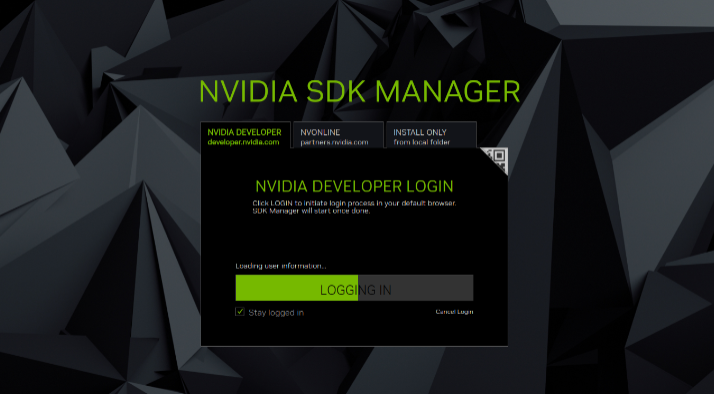
Entering Recovery Mode#
For boards with a Recovery button, press and hold as per the documentation. For the Orin NX (which lacks a Recovery button), we short specific pins during power-on.
According to the Nvidia Jetson Orin NX documentation, short the GND and FC REC pins for 10 seconds. These pins are located directly beneath the fan:
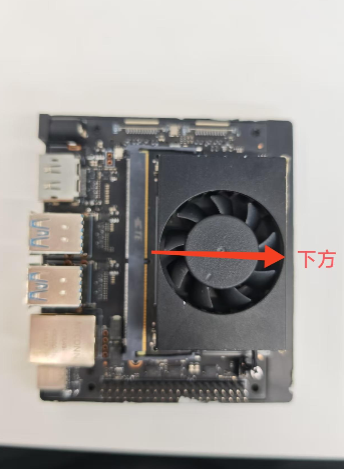
GND is the second pin, FC REC is the third:
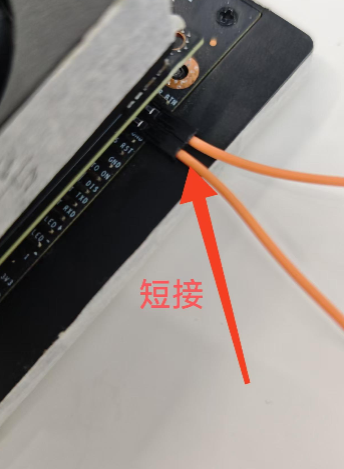
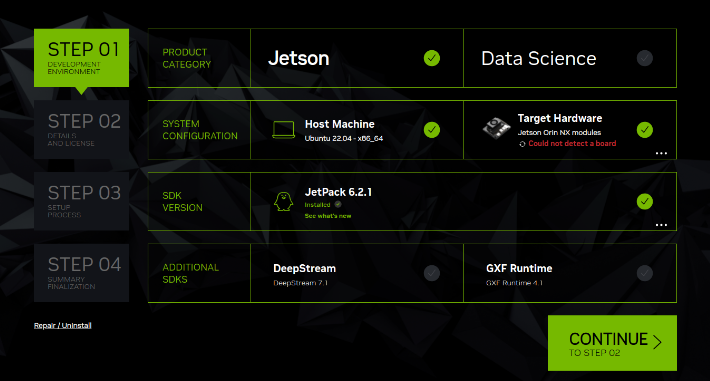
Short the two pins, connect the USB to your host PC and the Type-C to the Jetson, then power on for 10 seconds. SDK Manager will show the following screen, indicating successful recovery mode entry.
Important: Do NOT click “Continue” yet. Remove the Dupont wire now — it is no longer needed and could damage the board. Keep the power supply connected throughout the flashing process.
Flashing Process#
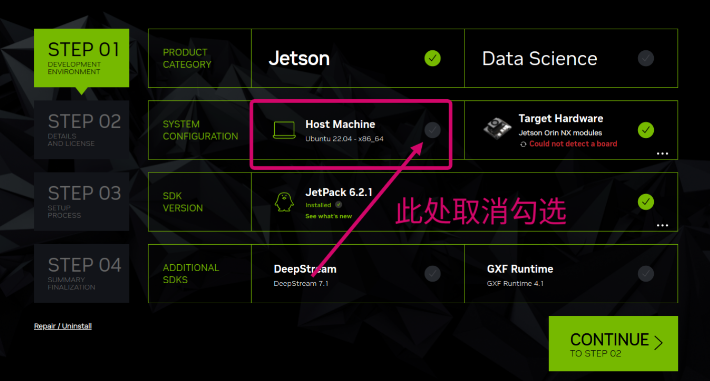
Back in the initial screen, configure the following:
- Uncheck Host Machine
- Under Target Hardware, select your board model (should auto-detect after USB and Type-C connection)
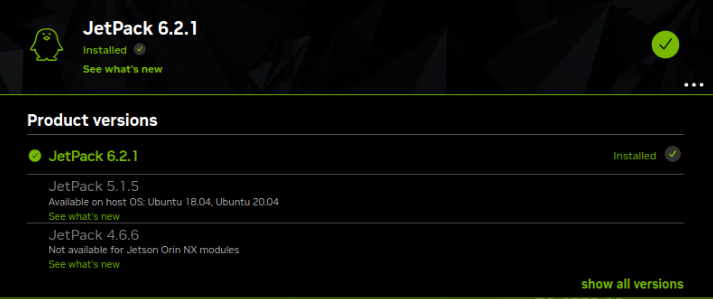
- Select the JetPack version matching your Ubuntu target — JetPack 6.2.1 supports Ubuntu 22.04
Click Continue to proceed to step 2. Leave the default component selections. Check both options at the bottom (“Download now” and “Install later”) — SDK Manager will download the required packages first. If prompted that no Nvidia directory exists, click “Create.”
When the progress bar completes and “Download Completed successfully” appears, click “Finish” to proceed to installation.
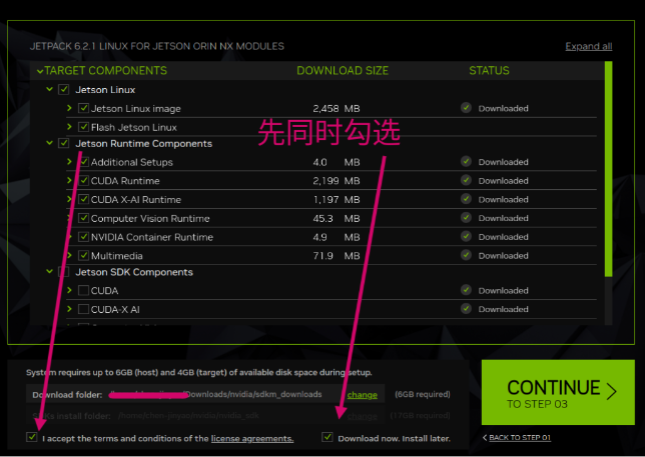
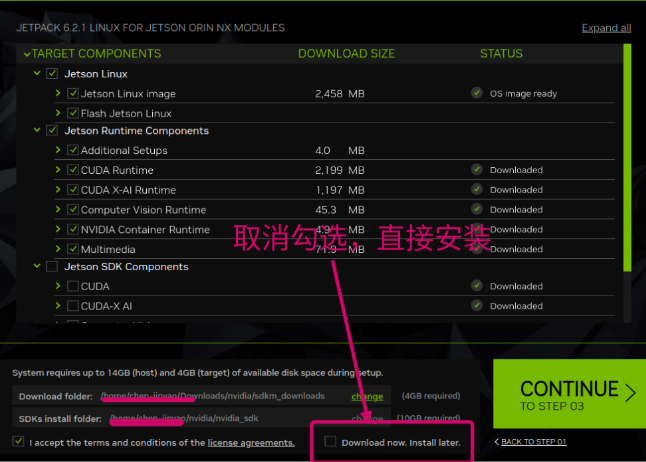
SDK Manager returns to the first step. Repeat the earlier configuration (uncheck Host Machine, select JetPack version) and proceed. In the component list, all items should show “Downloaded.” Now uncheck “Download now. Install later” since all components are already downloaded, and proceed directly to installation.
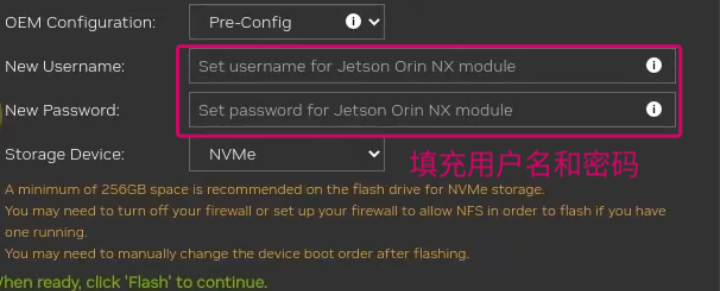
SDK Manager will now begin the lengthy flashing process. The first popup asks for a username and password — similar to a fresh Ubuntu install. Use jetson or nvidia to avoid potential SSH issues later.
Subsequent popups will appear. Since we’re using USB (not Ethernet), ensure “USB” is selected. The username and password should match the first entry (usually no changes needed).
Critical: Maintaining USB Connection Stability#
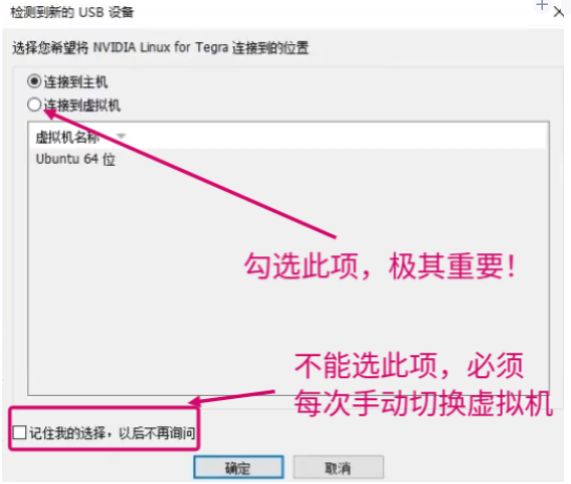
Stay at your screen during the flashing process, especially VM users. The system will repeatedly disconnect (Removed) and reconnect (added) the USB device. Dual-boot users just need to monitor automatic reconnection. VM users must manually reconnect the USB to the virtual machine each time — never select “Remember my choice”:
Flashing Complete#
Connect the monitor, keyboard, and mouse to the Jetson. As flashing progresses, the display driver will install and you’ll see the Ubuntu installation process on the monitor. Now just wait — keeping the USB connection stable.
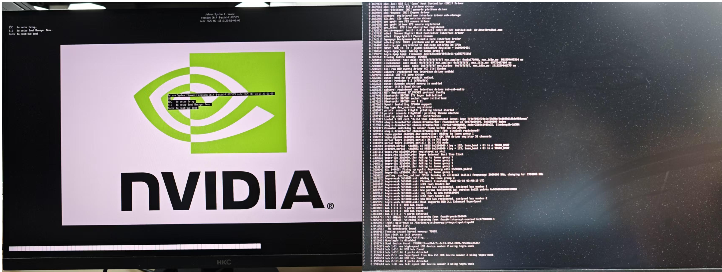
When SDK Manager’s progress bar completes and shows “Finished,” flashing is done. The monitor will display the Ubuntu login screen — username jetson. Mission accomplished!
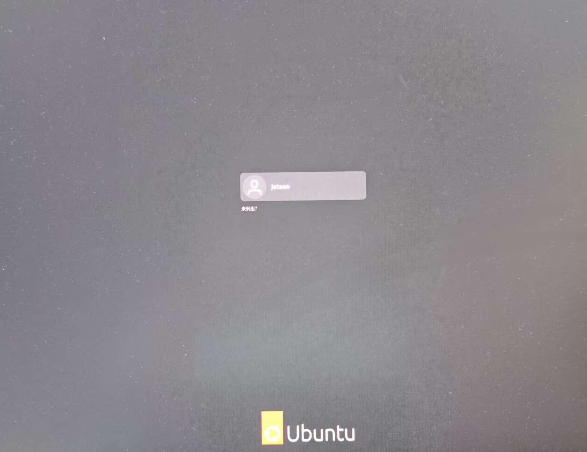
Now connect your peripherals and configure the system. Clone the Micro-XRCE-DDS-Agent, ROS2 workspace, px4_msgs, and px4_ros_com source code onto the Jetson as described in the simulation setup articles. Once flashing is complete, the next step is Controlling PX4 via MAVROS2 to achieve Offboard takeoff.
Summary#
Like setting up a simulation environment, real-flight experiments have higher safety requirements and correspondingly more involved procedures. This article aims to make it easier for readers to begin real-flight experiments with ROS. In hands-on engineering fields like ROS and UAVs, experiential knowledge is indispensable — it lets us focus our energy on the core work. The author looks forward to continuously supplementing, correcting, and updating this knowledge together with the community.
As always, suggestions and feedback are sincerely welcomed. Thank you for reading and for your continued support!